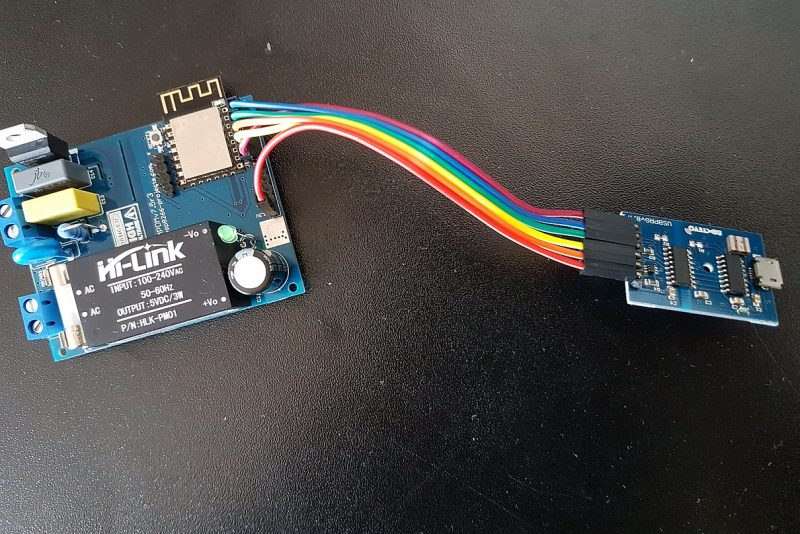
ESP Easy Series, Part 1: Firmware upload and MPDMv4 driver simple test
The ESP Easy firmware can be used to turn the ESP module into an easy to use multifunction sensor device for Home Automation solutions, been easy to integrate it in setups based on Domoticz, OpenHUB, etc.
The configuration process of the ESP Easy is entirely web based, so once you’ve got the firmware loaded, you don’t need any other tool besides a common web browser.
You can find more details about ESP Easy firmware HERE, on the ESP Easy WIKI page
What we will need:
– ESP8266 NextEVO Board
– MPDMv4 Universal AC Dimmer – available also on Tindie Store !
– PCA9685 16CH PWM Extension board
– MPRSx8 Home Automation Board
– ESP Easy firmware
– Raspberry PI 2 Board
– Domoticz
Lates available bin on a Raspberry PI 2 Board install :
sudo curl -L install.domoticz.com | bas
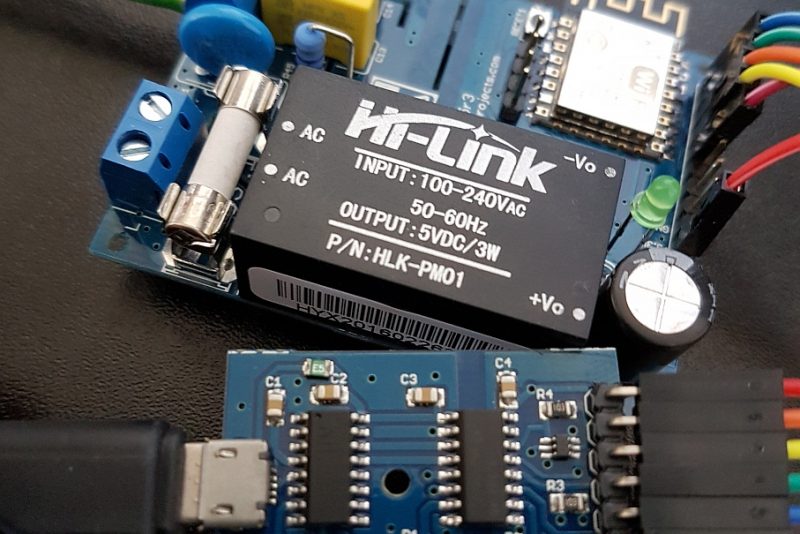
First thing that I want to mention, as I found that a lot of people sometime forget about this simple one: You DAC/ADC/PWM, etc Input/Output is as good as your Power Supply/Voltage regulator!! If you have a crap power supply/regulator output with bad filtering & stuff, don’t expect miracles happening!
You have at least 3 ways to drive a MPDMv4 AC Dimmer:
1. ESP8266 PWM output:
It is working OK as long as you don’t have any blocking process running on the ESP8266 that can badly interrupt your PWM signal (1/2 second and more). With a bit of attention to some details and also for not to complicated lighting setup scenarios is working very nice.
I will do also a more complicated setup example Youtube Video showing you the MPDMv4 AC Dimmer working OK driven directly by ESP8266 PWM pin, connected as a daughter board on the MPRSx8 Home Automation board. From Domoticz you can drive thru ESPEasy the MPRSx8 8ON/OFF AC Relays AND MPDMv4 AC Dimmer channel without any problems at all!
MPDMv4 AC Dimmer board has a first order filter on the VCNT input so can handle even noisy PWM and decent level of duty cycle skipping/derating.
2. Dedicated PWM IC.
I have used with a lot of success the PCA9685, working very smooth and has no problem related with ESP8266 workload process, etc. You can find more about a PCA9685 Board here. Probably the best solution for multiple AC Dimmer boards (upto 16 per each PCA9685 Extension Board).
3. Digital driver using a dedicated DAC IC.
VCNT input voltage driven from a MCP4726 12 bit DAC output is working very smooth and has no problem related with ESP8266 workload process, etc, same as with PCA9685.
As been a 12 Bit DAC it’s giving you very fine VCNT control. I have designed also a Dimmer board with integrated DAC and digital control, but that’s another story.
In Part 2, we will talk about Domoticz setup and MPDMv4 AC Dimmer control interface.